Google Play Store is used by millions of Android users to discover and download new apps and games on an Android device. Every day, thousands of app developers upload apps and games across multiple categories on the Play Store. If you want to enjoy maximum visibility and reach of your app, publishing it on the Play Store should be your first step. In this blog, let's understand how to publish an android app in Google Play Store.
Before moving on to the step-by-step instructions, here are some prerequisites you need to fulfill. If you have an app, then you need to have the following things before beginning the upload process:
- Unique Bundle ID
- Signed App Release with a Signing Certificate
- APK expansion files in case your app APK is more than 100MB
- Google Play Console account with Play Publisher rights
App Publishing Process: Step By Step Instructions
Step 1: Prepare Your App Information
Before beginning the app publishing process, you need to have basic information related to the app ready with you. Google Play Store requires you to fill up important information about the app that informs user what the app is all about. You need to have the following things before starting the process:
- Short App Description
- Long App Description
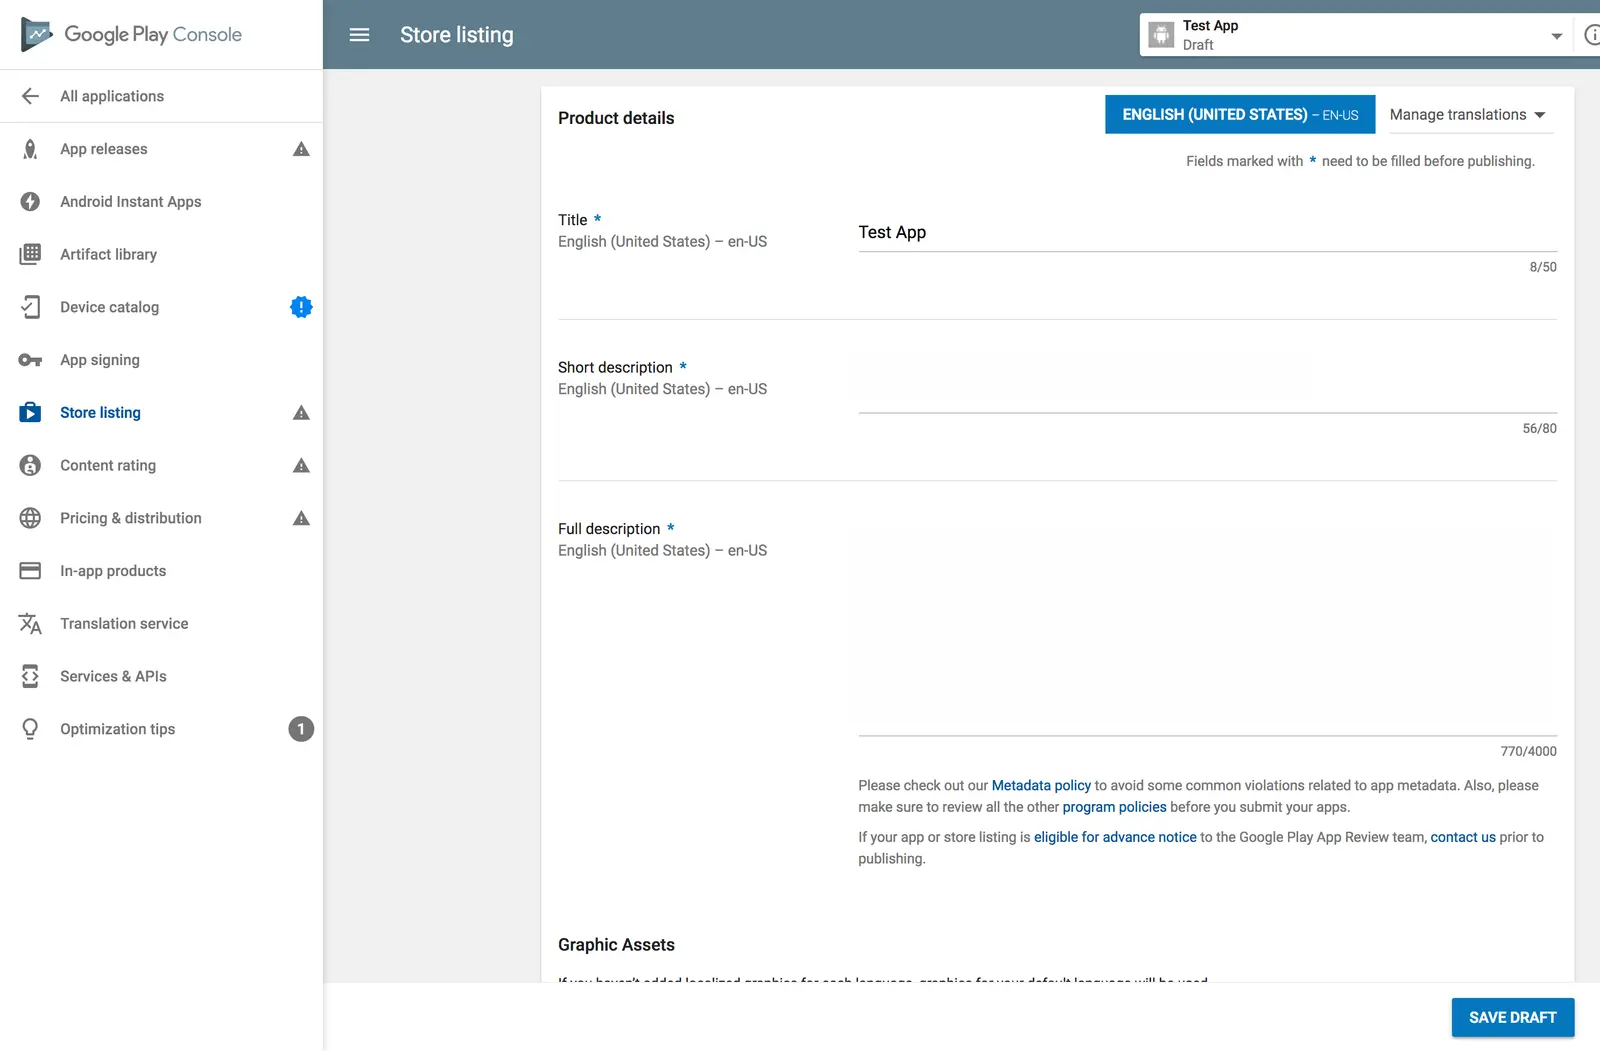
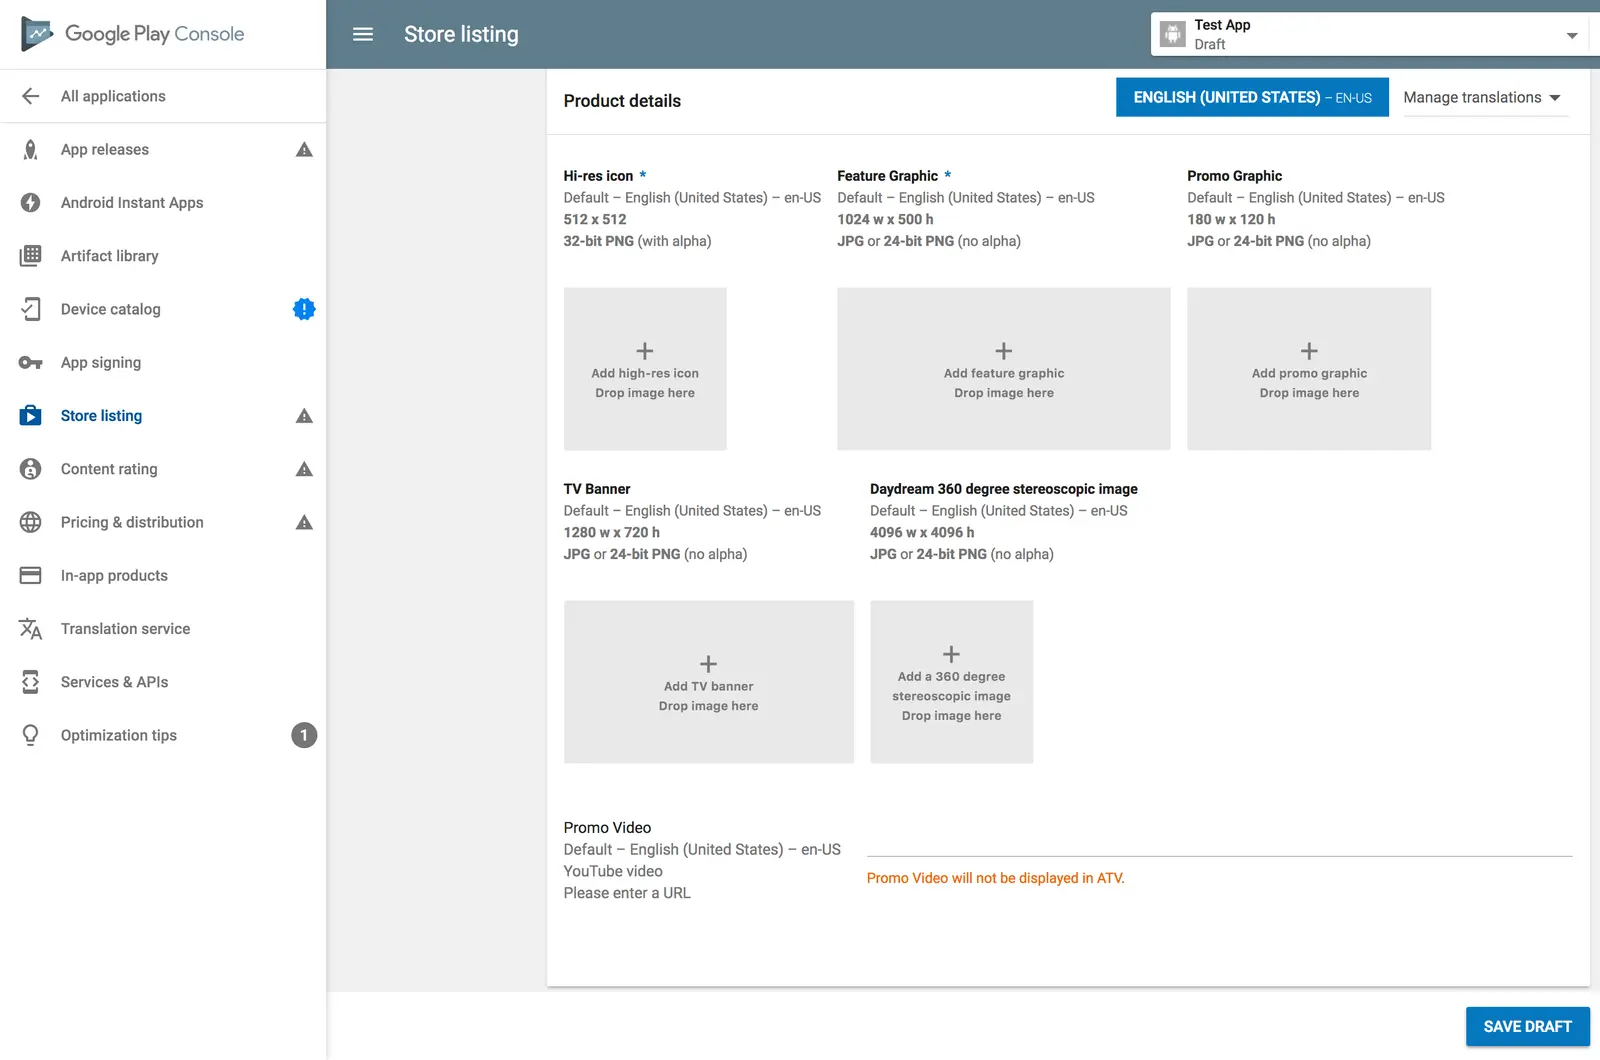
- App Screenshots

- High Resolution App Icon
- Feature Graphic
- Video Link to the App
- Application Type Specification
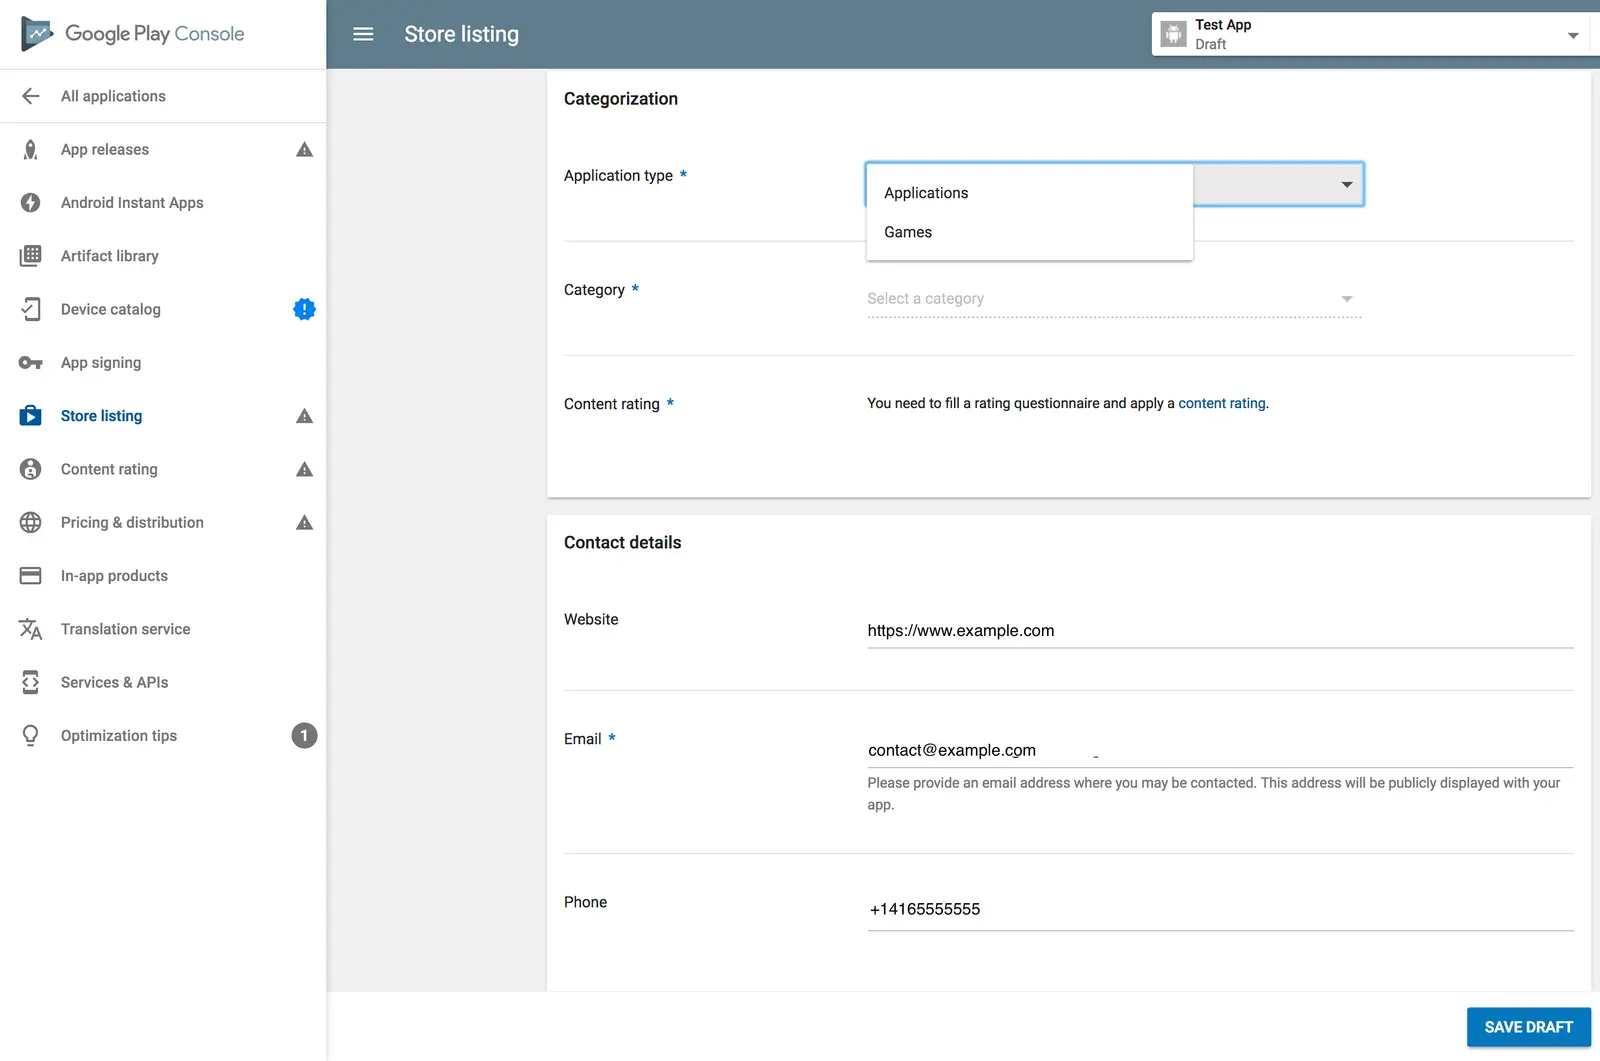
- Category of the App
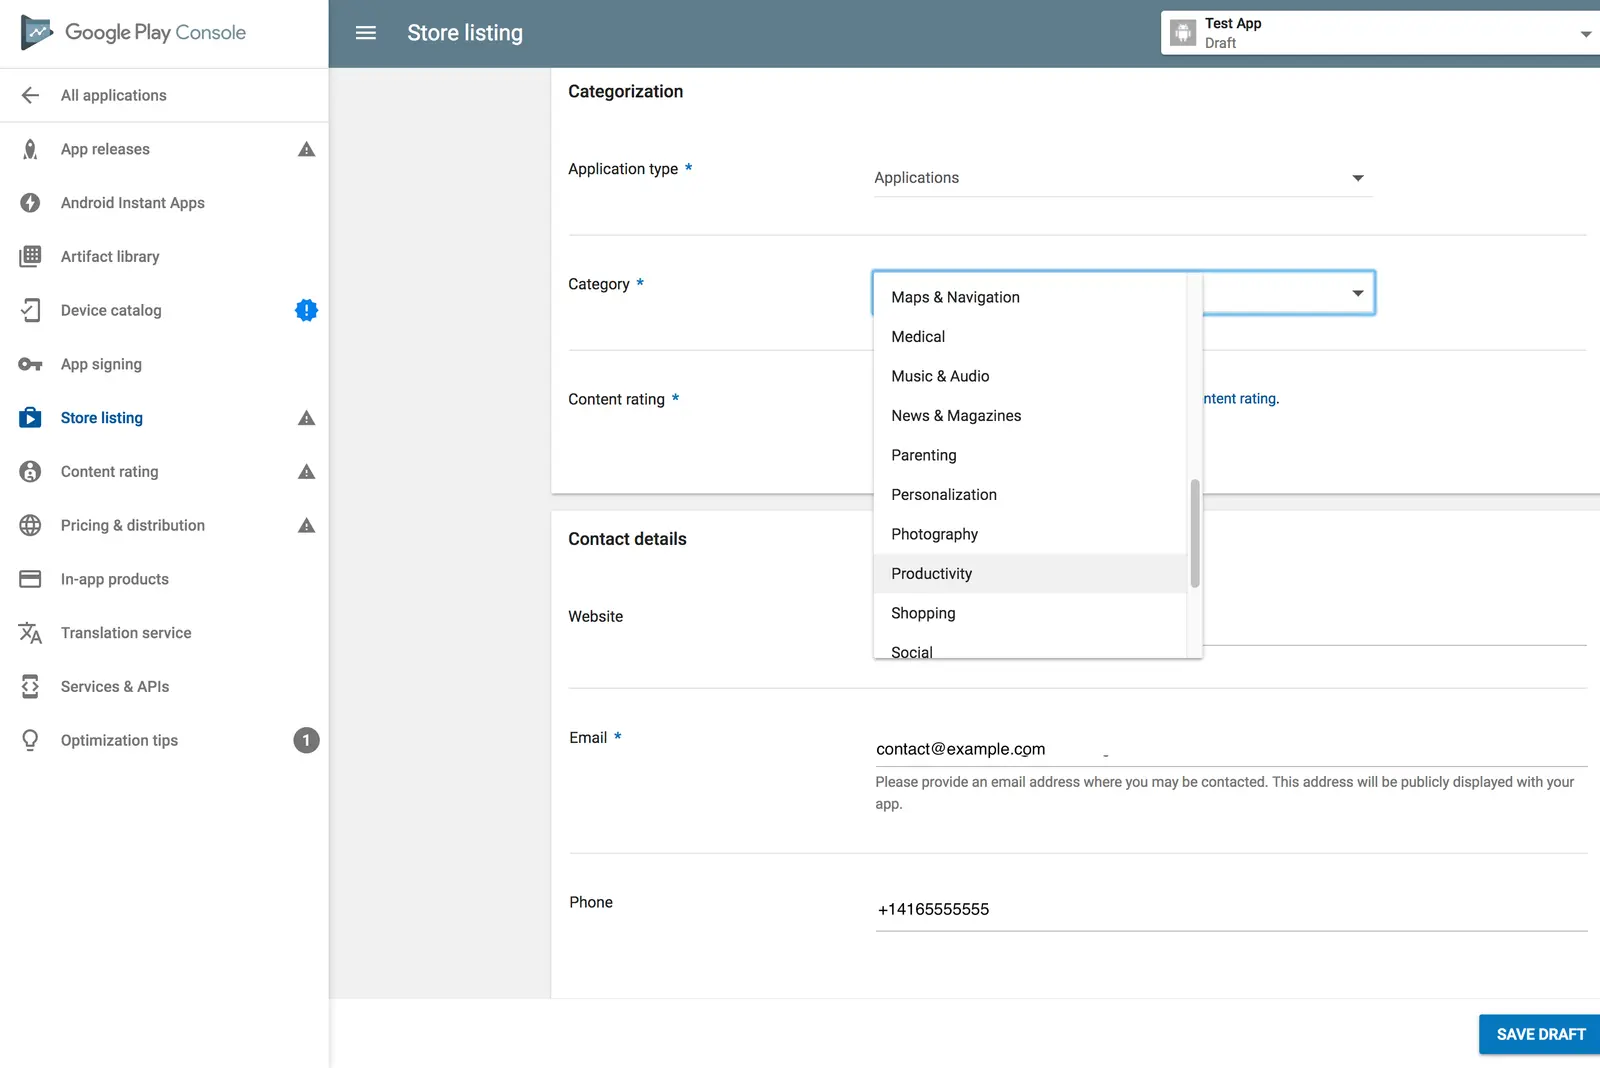
While it is optional to add feature graphics, other information is mandatory for you to fulfill while publishing the app. Once you have the above ready, log in to Google Play Console using Play publisher credentials and Click on 'Create App' on the menu on the left side of the screen. You will be asked to choose the app language, and app name, and input all of the above in the subsequent pages.
Enter all information diligently and make sure to cross-check the contact details, too. You will also be asked to fill out a questionnaire for content rating by the end of the process.
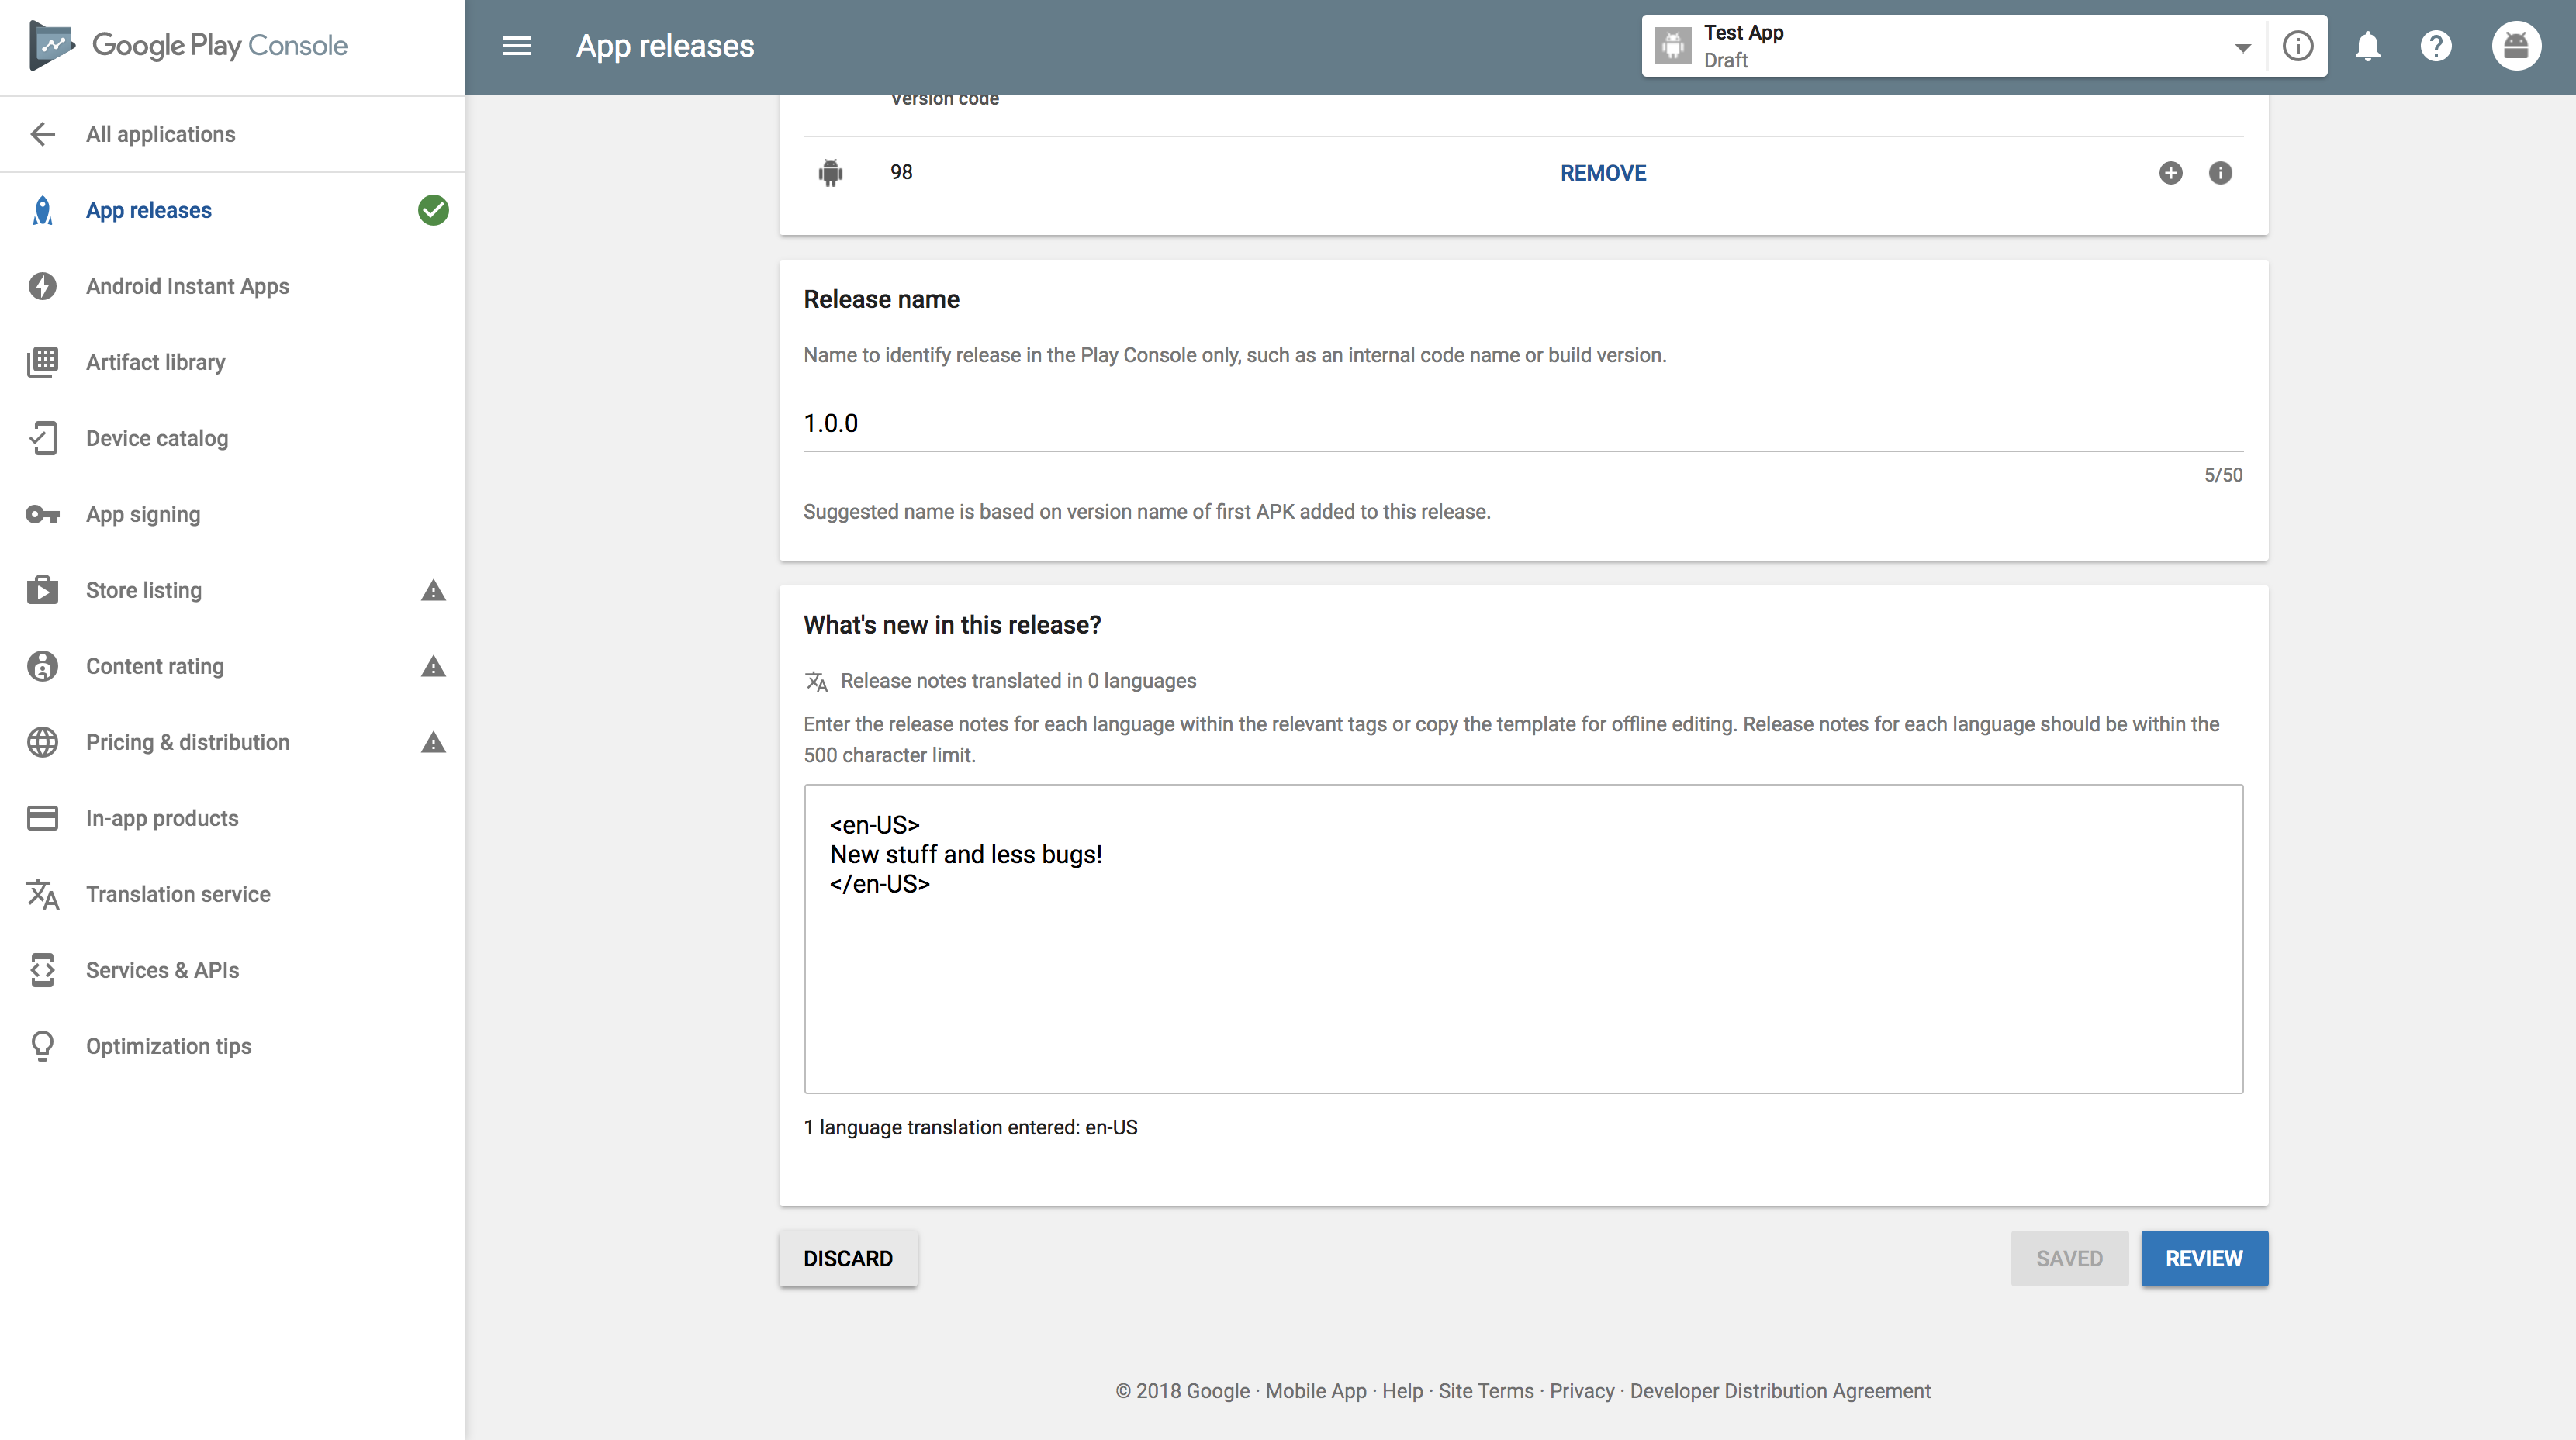
Step 2: Upload the APK File or App Bundle
Once you are done with the basic information, you will be required to upload your app files to the play store. Click on App Releases section on the menu to begin the process. First of all, you will be asked to categorize the type of release. You can choose Beta or Alpha releases if you want to gather user feedback and planning to test your app. If the app is final and ready for launch, click on the Production option.
After choosing the type of release, you can move on to the next step. Click on ‘Create Release’ to move to the production page if your app is ready. Here you will be asked several things and will actually upload the files.
- Click on 'Browse Files'
- Upload your App's APK or app bundle

- Click on 'Review' button to confirm and submit your app release information
You will also be asked if you want Google Play App Sign In or not for the app. Choose ‘OPT-OUT’ if you have a local sign in process for your app.
Also, you will need to complete a content rating questionnaire, and finalize the pricing and distribution plan for the app before the launch.
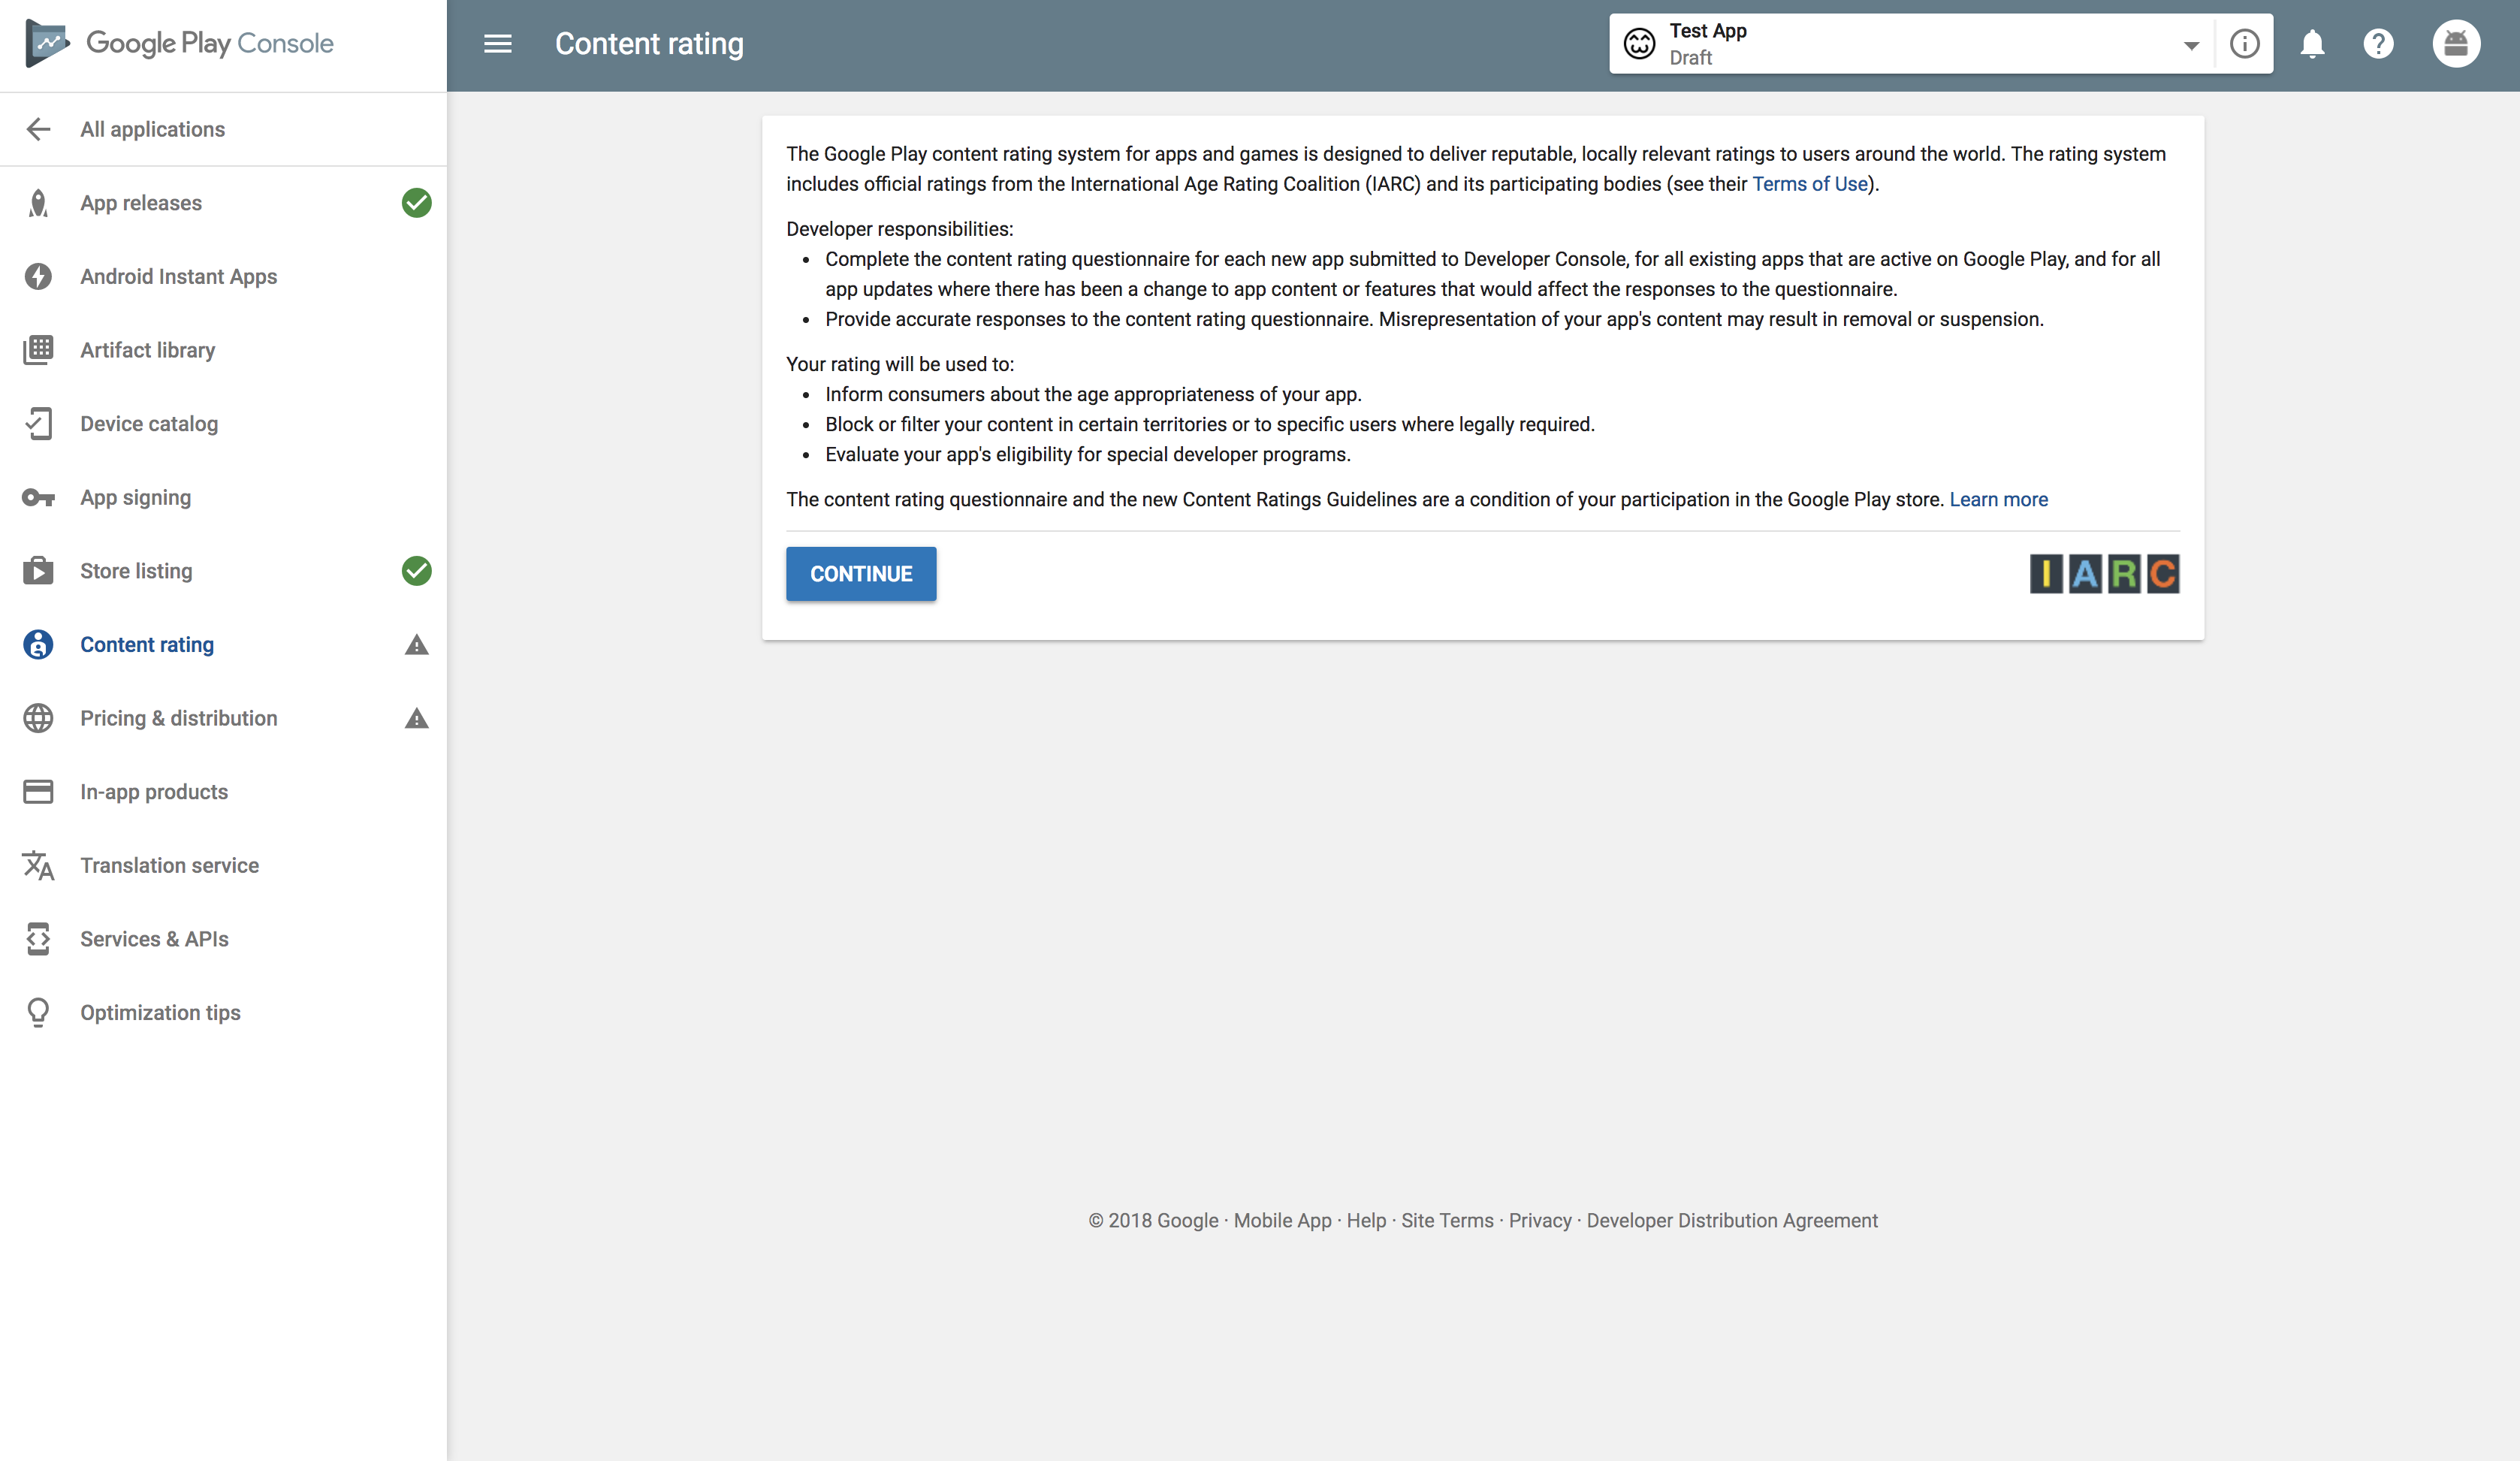
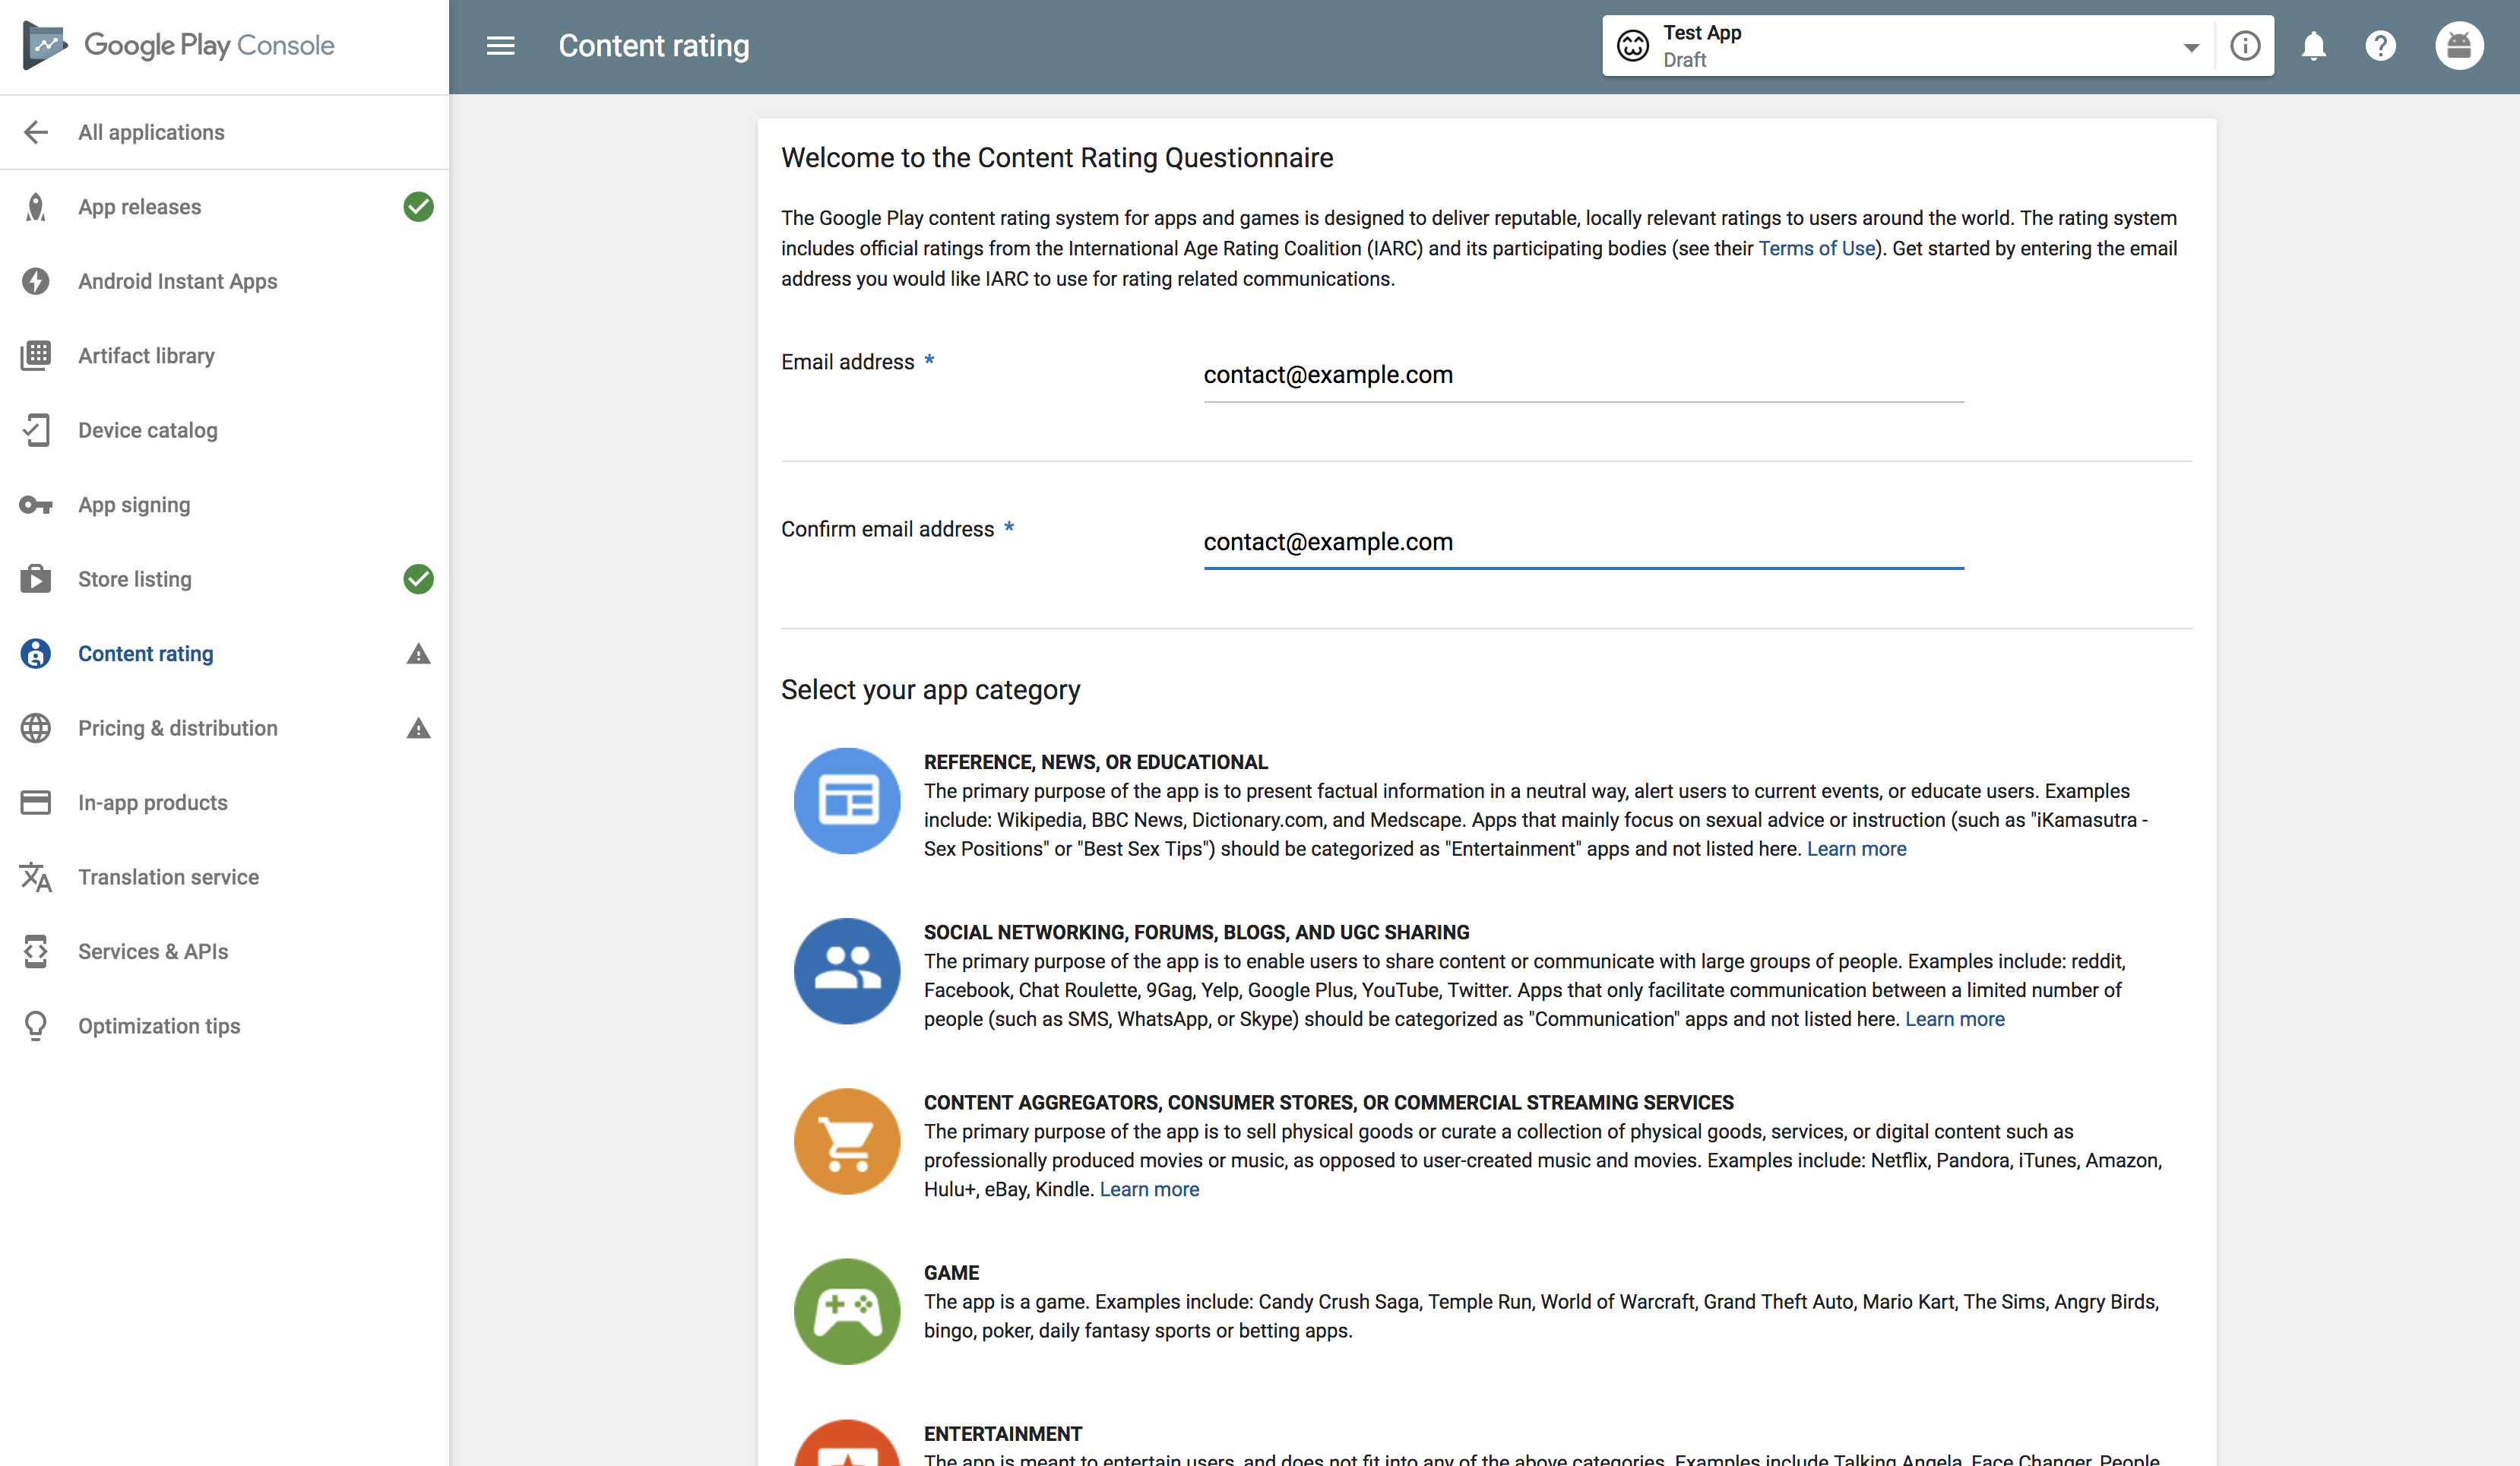
Step 3: Finalize Your App’s Content Rating
This involves filing a small survey to help Google understand if the app covers any explicit content category. To complete your app’s content rating survey, follow the below-mentioned steps:
- Open the 'Content Rating' page from the left menu
- Click on 'Continue'
- Enter your email ID and confirm the same
- Choose your app category
- Move ahead to start filling the app rating survey
- Click on ‘Save Questionnaire’ once you complete the survey
- Click on ‘Calculate Rating’ Button
- In the end, click on ‘Apply Rating’ button to confirm the rating and move forward with pricing & distribution plan.
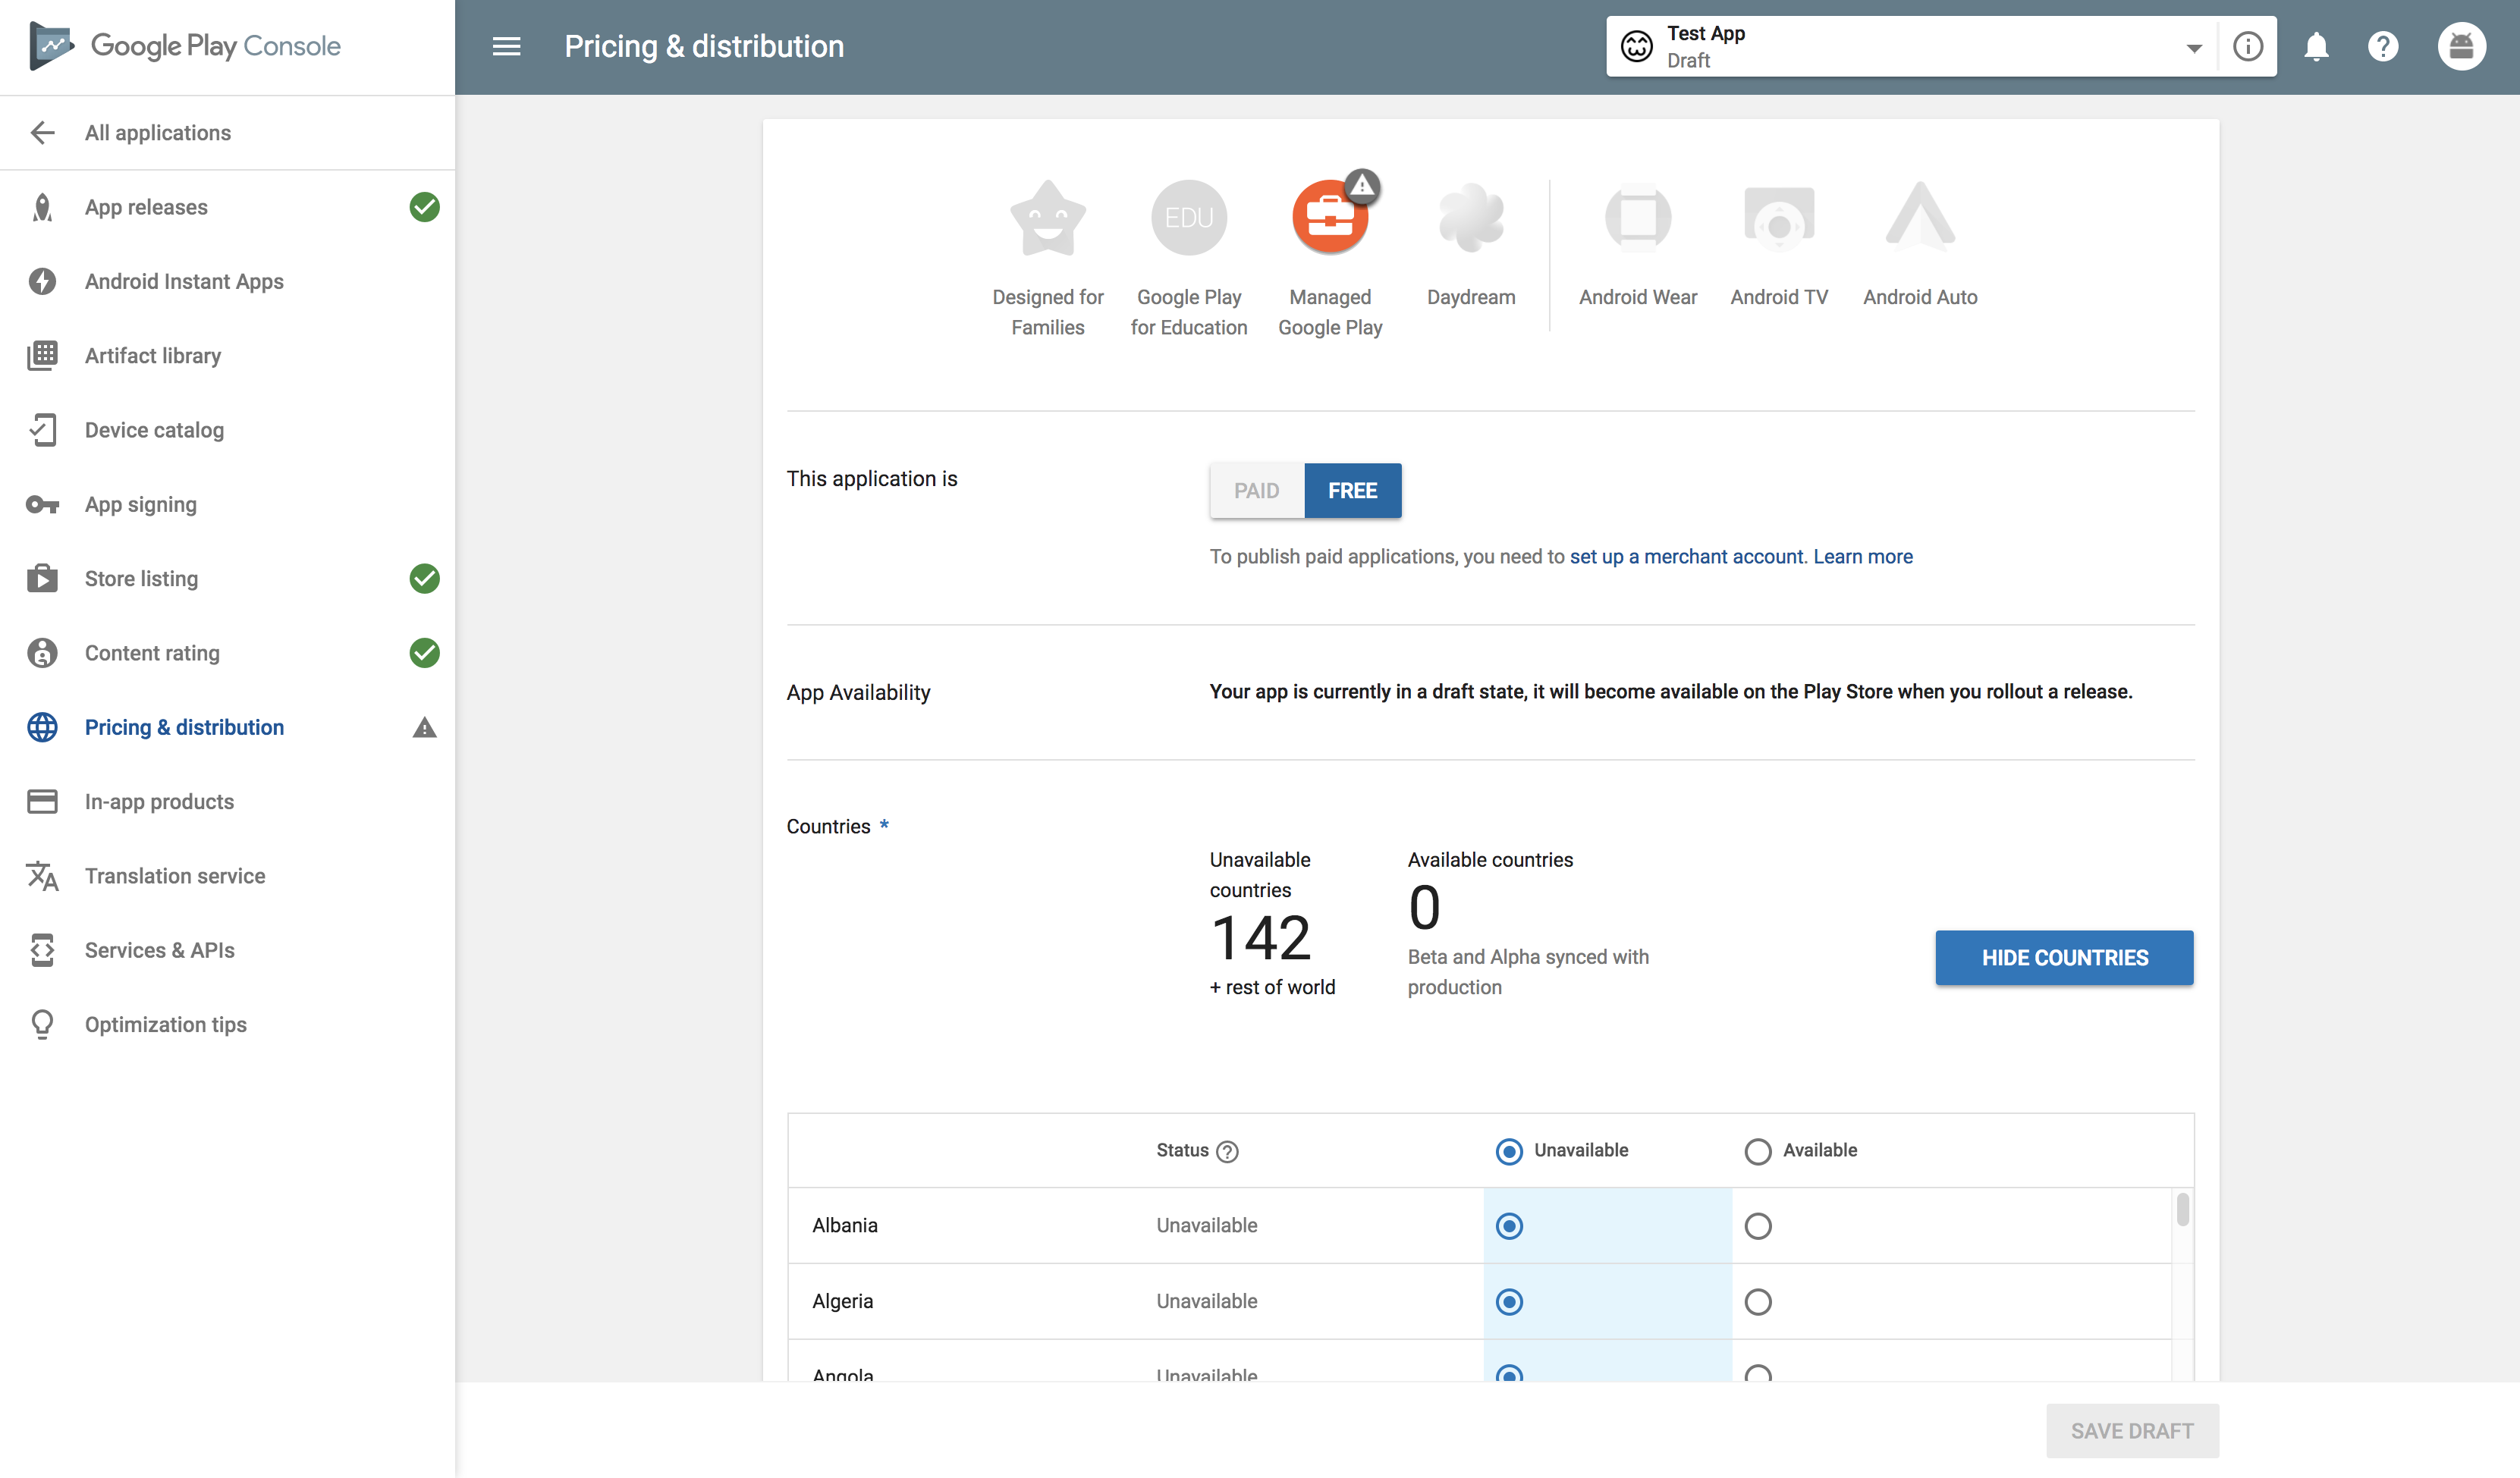
Step 4: Finalize the Pricing & Distribution Plan
If you want users to pay for using the app, then you need to have a pricing strategy. Moreover, you can also select the countries you want to target. If you have a general app and want a worldwide release, then you can move ahead with that, too.
To finalize all of this, you need to go to Pricing & Distribution Page and take the following steps:
- Choose if you want your app to be FREE or PAID
- Choose the countries you want the app to be available in. If you want to exclude any countries, select those from the unavailable option.
- If your app has sensitive content and is not suitable for children under the age of 13, select ‘No’ in Primary Child-detected, or else choose Yes.
- Click on 'Yes' in the next column if your app contains ads
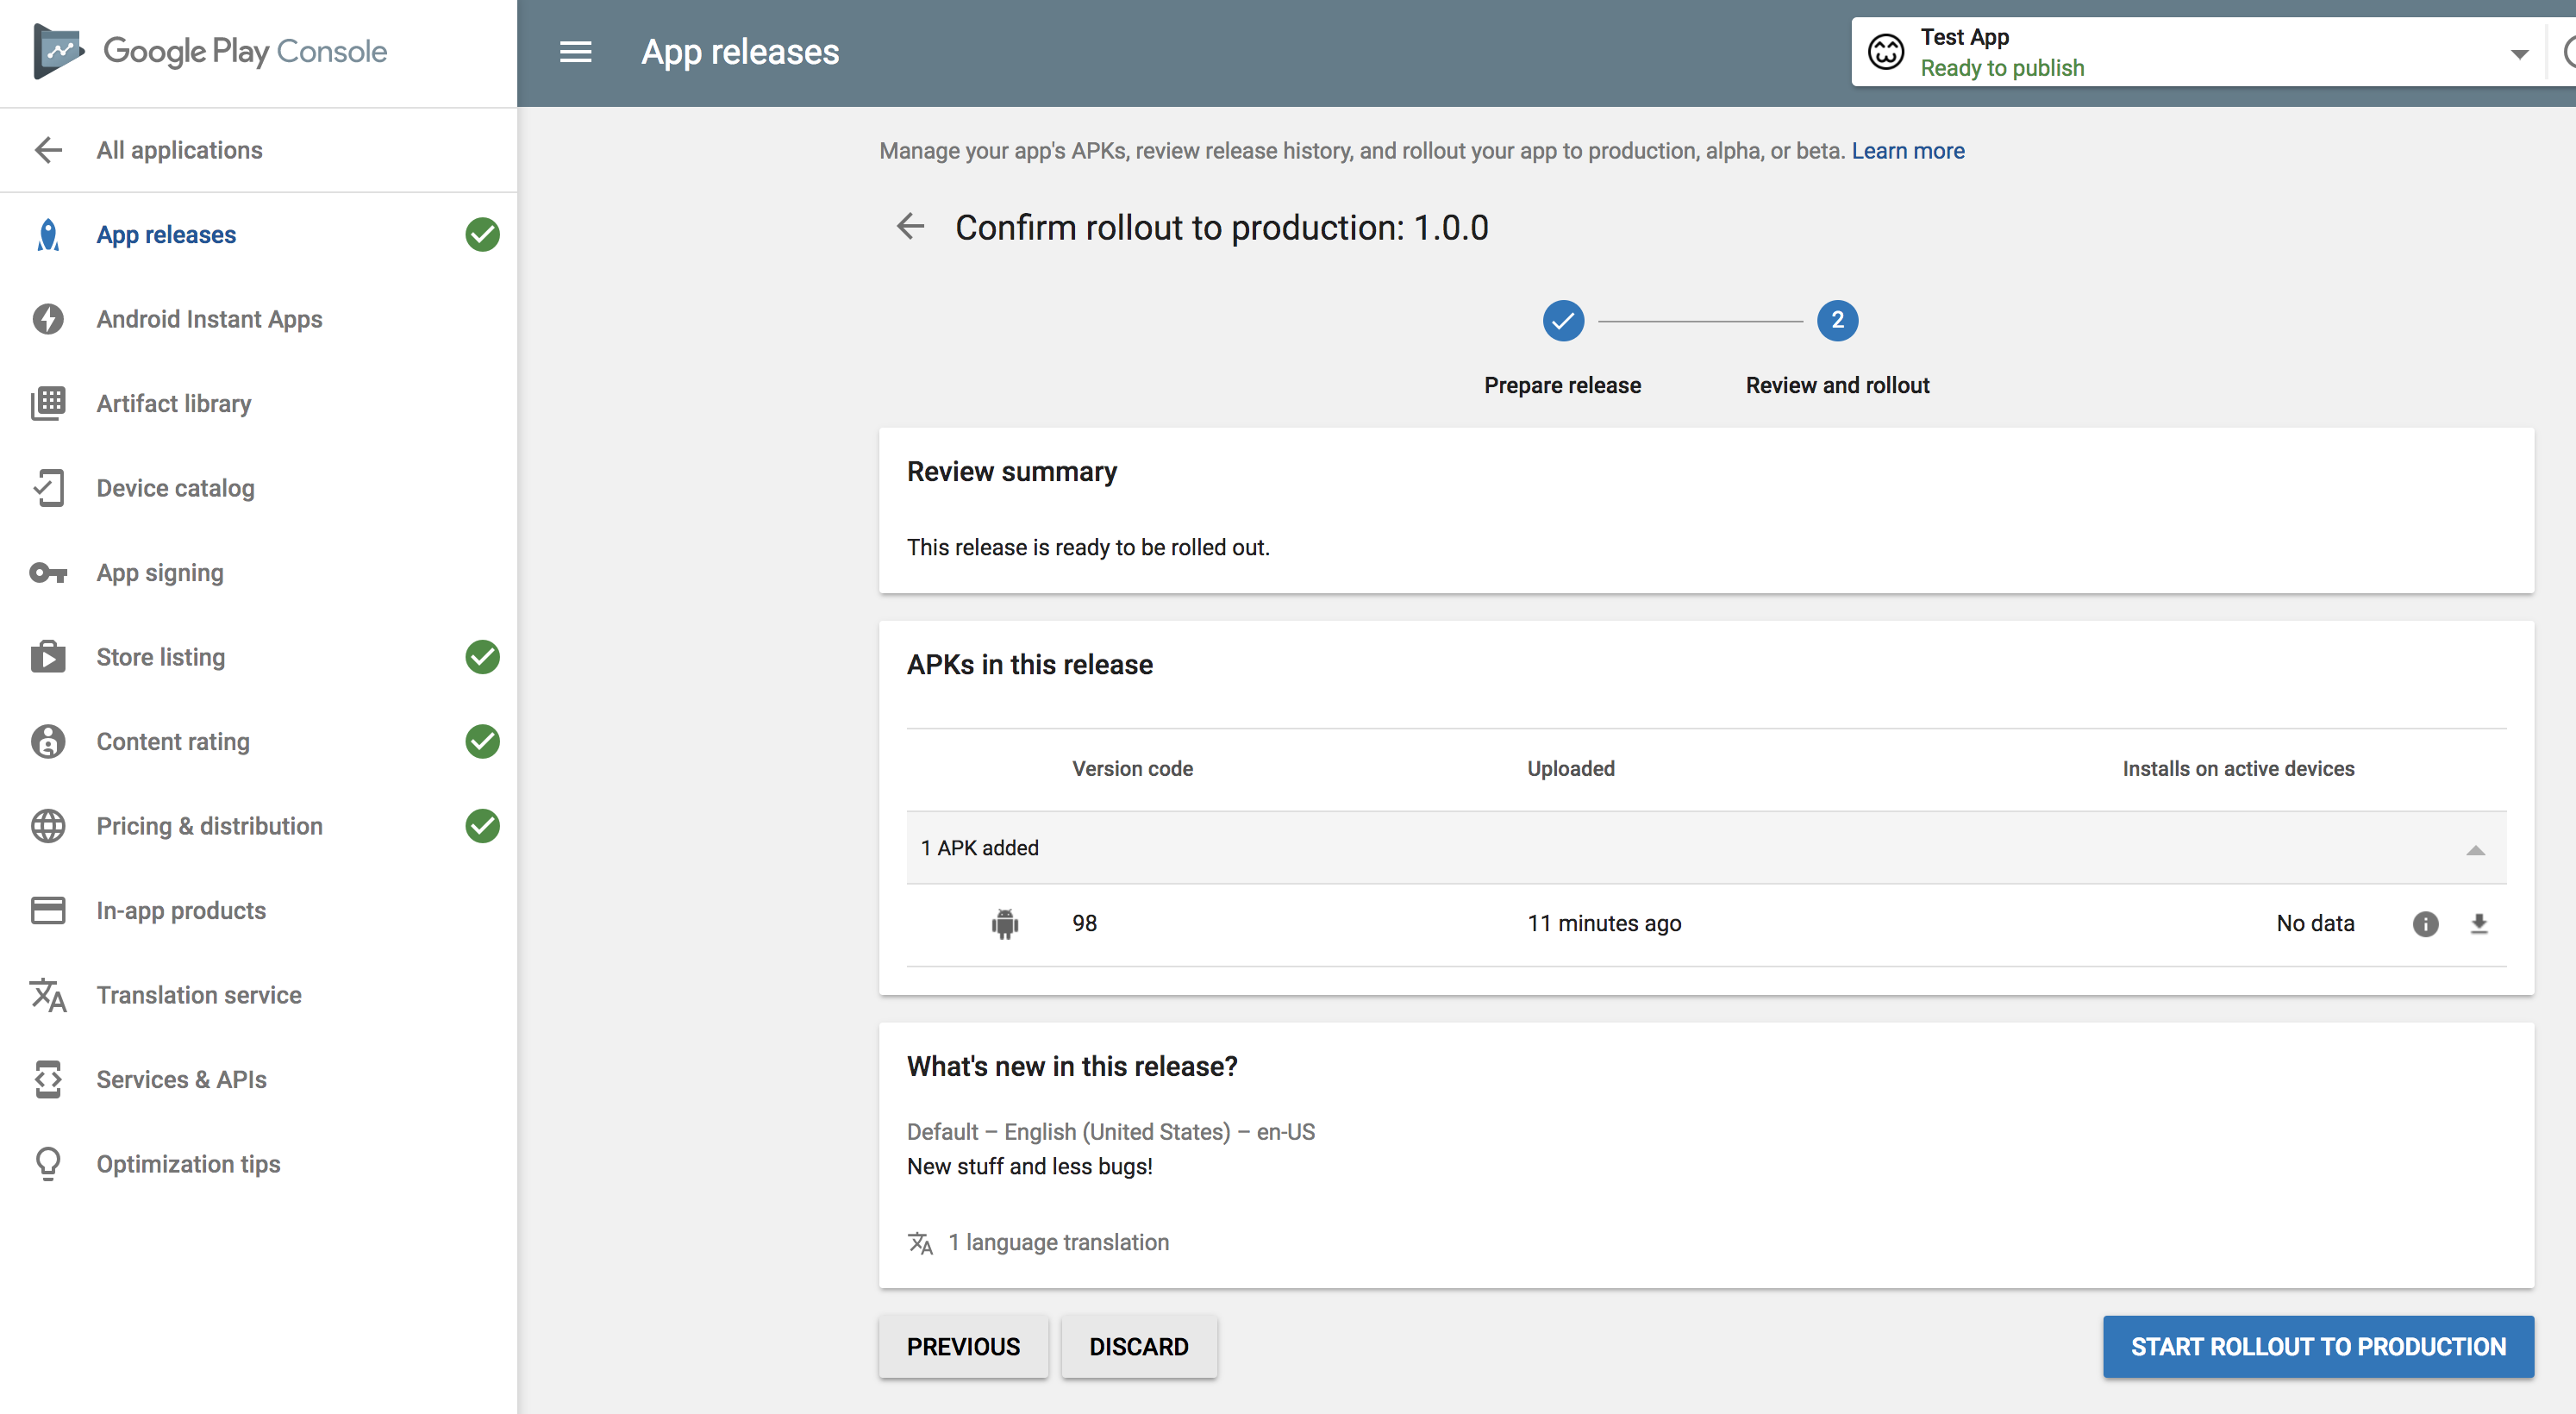
Step 5: Publishing Your Android Mobile App
Now that you have completed all the above steps, you are ready to publish your app and invite users to try it out. Go to the 'App Releases' option on the left panel and follow the steps:
- Choose Manage Production (Beta or Alpha in case of early releases)
- Click on Edit Release
- Click on Review
- Select 'Start Rollout to Production' to move ahead with the publishing process
- Click on 'Confirm' when asked
Once you have done all this, your app is ready for Google to review. If everything is right and according to Google’s policies, your app will become live on the Google Play Store. Then your target users can discover your app and start using the same. It is always better to engage an expert to publish your android app or the android app developer who built your app. If you are not confident about whom to reach out, then our app experts can help. Let's Connect to launch your android mobile app today.